Entering Requisition
Use the Requisitions window to:
- Enter internal and purchase requisitions. Your approval and security setup options determine which types of requisitions you can enter.
- Take approval actions on individual requisitions online.
- Edit requisitions. Your approval and security setup options determine which requisitions you can edit.
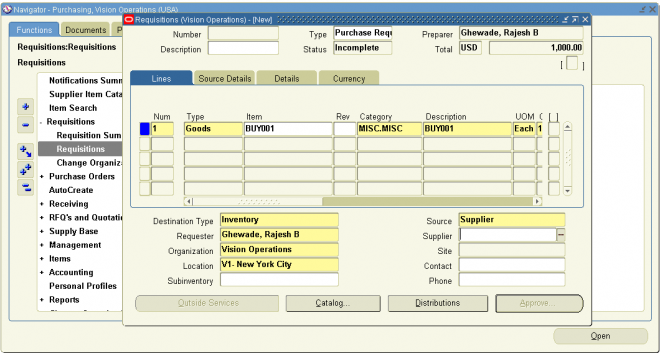
1. Navigate to the Requisitions window from the menu, by selecting the New button in the Find Requisitions and requisitions summary windows, or by selecting the Requisitions button in the Order Pad of the Supplier Item Catalog.
The upper part of the Requisitions window has the following display–only fields:
Preparer – Your employee name from the Application User window.
Status – The requisition status:
Incomplete : The requisition is incomplete, or the preparer has not yet submitted the requisition to an approver.
Rejected : The approver rejected the requisition.
Returned : A buyer rejected the requisition. Purchasing returns to the preparer all requisition lines within the same requisition that are not on a purchase order.
Total : The currency code and the base currency total amount of all lines in this requisition.
2. Enter a unique Requisition number. If automatic requisition number generation is active, the cursor does not enter this field and the number is generated when you save your work
3. Choose the Requisition Type:
Purchase Requisition – The requisition lines are usually satisfied from an outside supplier by means of a purchase order.
Internal Requisition – The requisition lines are usually satisfied from inventory by means of an internal sales order.
When you enter requisition lines you can source them independently of the document type. You can mix inventory and
supplier sourced requisition lines in the same requisition of either document type.
To open the Supplier Item Catalog:
With the cursor in a requisition line row, select the Catalog button to open the Supplier Item Catalog.
To take approval actions:
After completing a requisition, select the Approval button to open the Approve Documents window.
To check funds:
Select Check Funds on the Tools menu.
To unreserve funds:
If budgetary controls are enabled you can unreserve funds.
1. Select Unreserve from the Tools menu.
2. Enter the Unreserve Date.
3. Check Use Document GL Date to Unreserve to use the document’s distribution GL dates for the funds reversal instead of the unreserve date.
4. Click OK to reverse the the funds reservation on this document.
To enter requisition preferences:
Select Preferences on the Tools menu to open the Requisition Preferences window.
To reaccess a requisition quickly:
Choose Place on Navigator from the Action menu. Choose the Documents tabbed region in the Navigator to later access the requisition more quickly.
Note: Once you place a document in the Navigator, it is the first thing you see in the Navigator the next time you log into
Purchasing. Choose Functions to return to the Purchasing menu.
How to default the supplier here
Hi,
Is there a way that the value against Supplier (in Requisitions window) can be defaulted to? Please let me know.
Thanks,
Ram